
AAF from Resolve to Pro Tools
So, you’ve made the switch to Resolve or have always used it and hopefully you are truly at "Picture Lock." Congratulations! Now comes the easy part…or for some the part that gives them anxiety. Sending your project to the mixer shouldn't be clicking export and hoping for the best. It’s really pretty straightforward. Follow this guide to ensure your project arrives in one piece and build better relations with your audio department.
1. The Preparation
Before you even look at the Export button, your timeline needs some "housekeeping." A messy timeline leads to time delays which lead to more cost.
The "Safety First" Duplicate: Never export from your master timeline. Duplicate it and label it clearly, like ProjectName_SoundExport_V1.
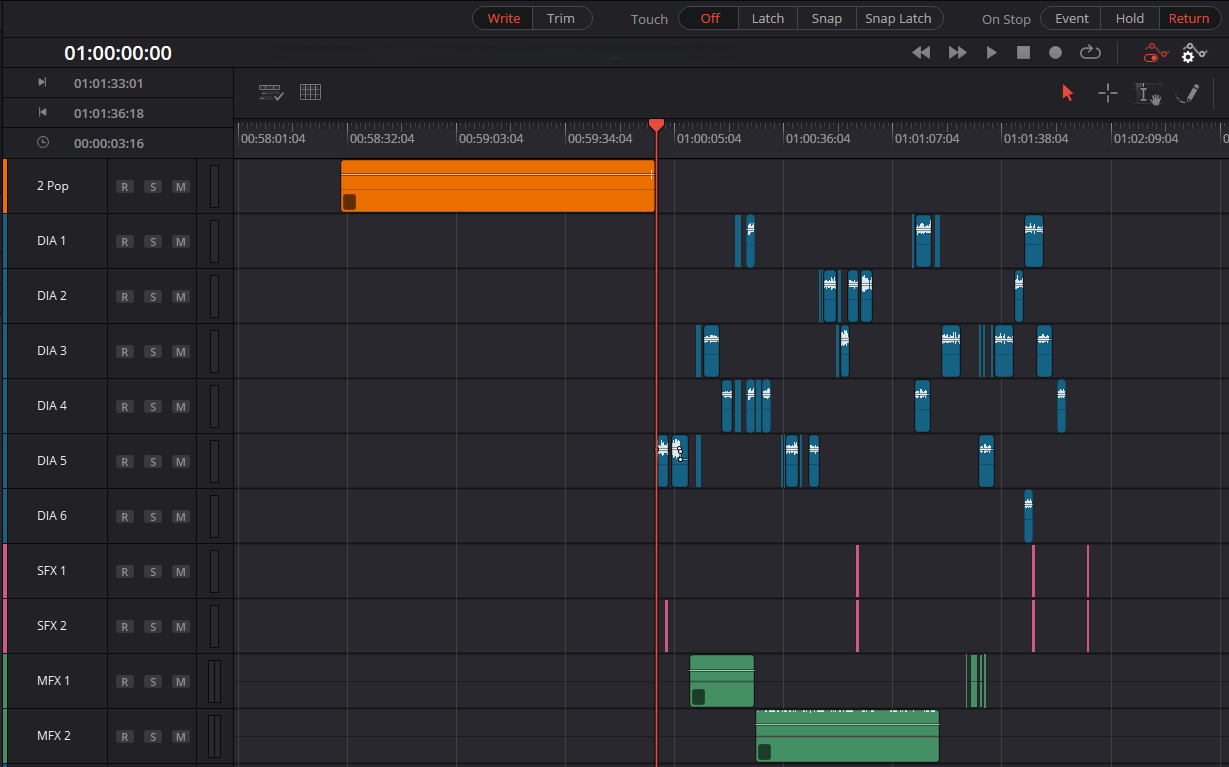
Organize Your Tracks: Don’t just leave clips where they fell. Group them logically into “food groups”—Dialogue, SFX, and Music. Each mixer has their own layout but as long as you keep them organized by food groups and clearly labeled they will be happy. Personally I like DIA at the top then SFX then MFX.
Declutter: Delete muted clips and any "ghost" media. If it's not being heard, it shouldn't be there. If you doubled a track to “make it louder” please delete the doubled track.
Clip or Track Effects: If you have any effects baked in or rendered to the clip please include the original clip. Trust me your mixer will be happy about this
Watch Your Language (and Symbols): Pro Tools can be picky. Avoid special characters in your naming. Stick to letters, numbers, and underscores.
Pro Tip: Avoid characters like / > < ! ® ü & @. They look cool, but they break AAFs.
Timeline with tracks labeled, FFOA at 01:00:00:00 and a two pop at 00:59:58:00
2. The Golden Rule: Sync and Leaders
The secret to a professional handoff is making sure everything stays in sync. We do this with "Leaders" and "2-Pops."
The Starting Line: Set your timeline starting timecode to 00:58:30:00.
The 2-Pop: This is a single frame of 1kHz tone placed exactly 2 seconds before the movie starts. Place it at 00:59:58:00.
FFOA (First Frame of Action): Your movie should start exactly at 01:00:00:00.
This ensures the mixer can visually and audibly confirm everything is perfectly aligned. If you need a leader with a two pop I can send one over in most common frame rates.
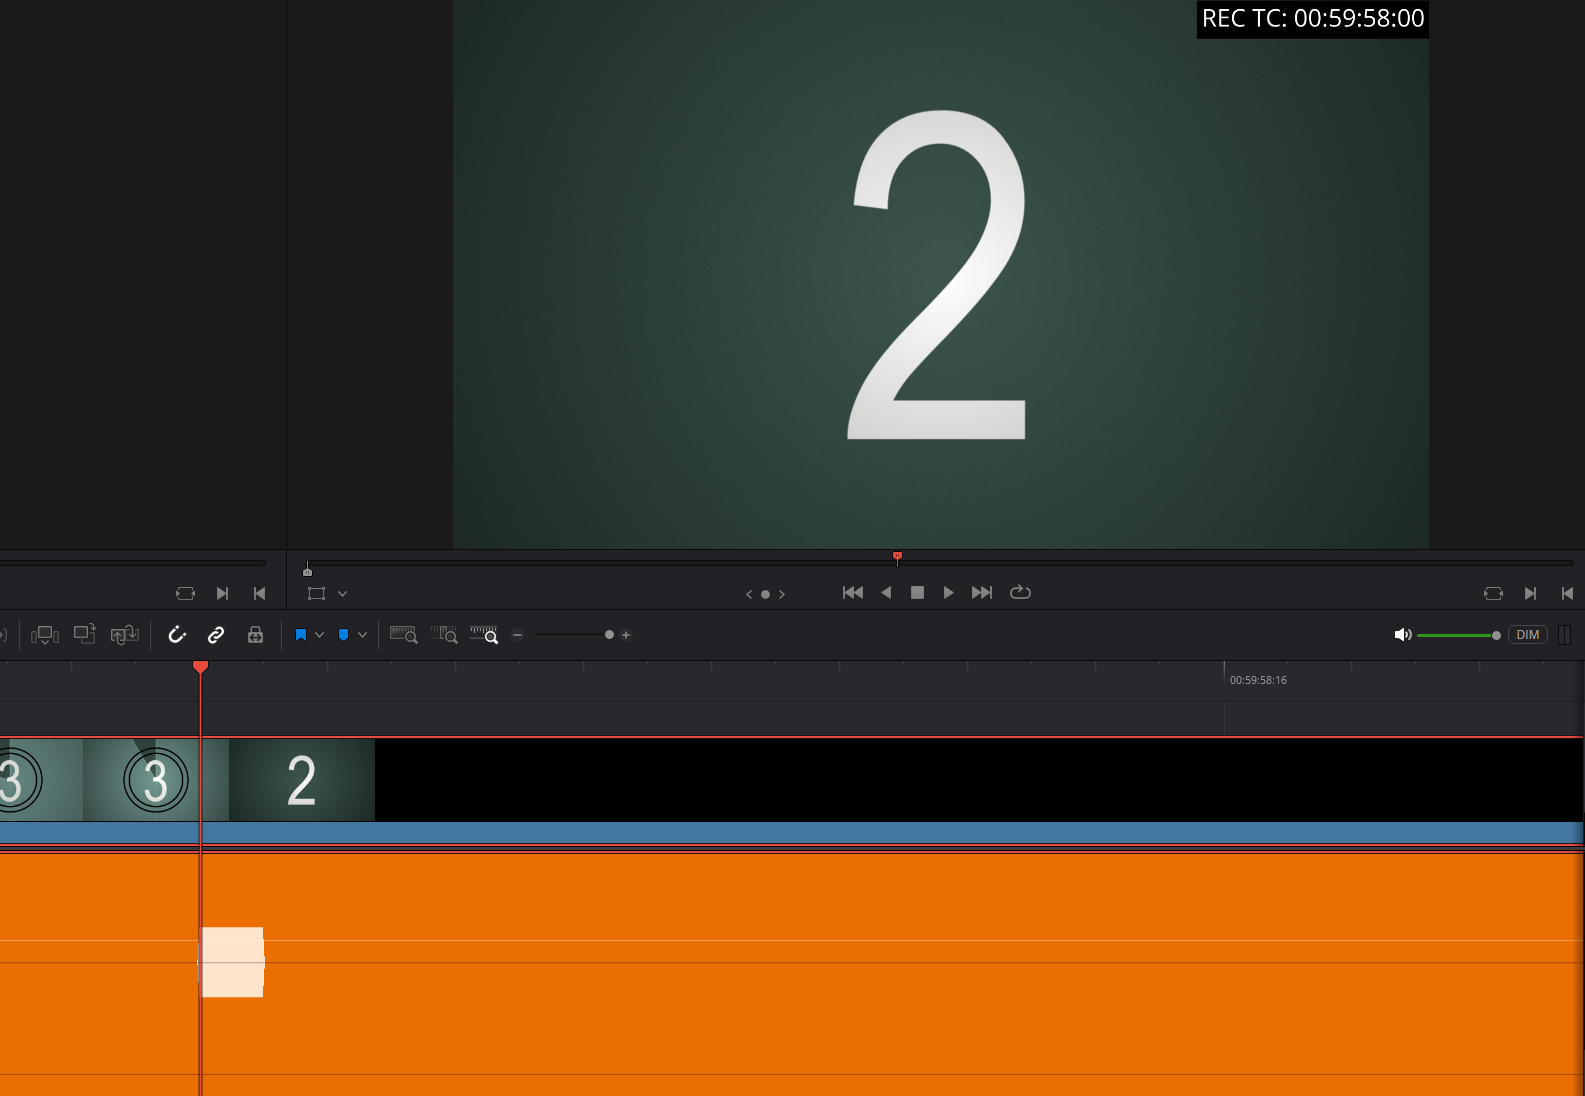
Two Pop with a leader
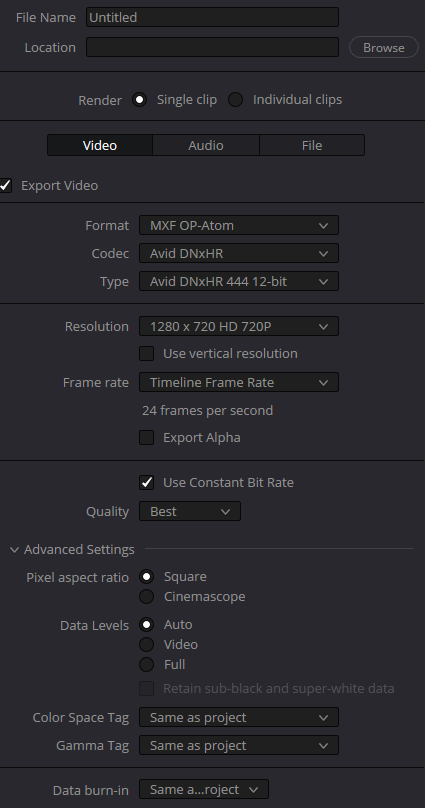
3. The Export Settings
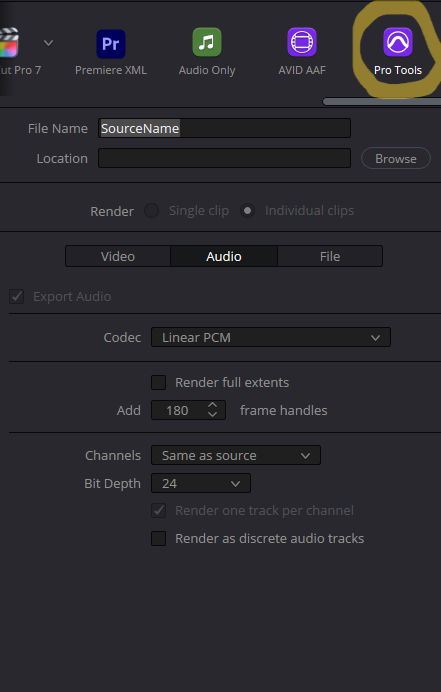
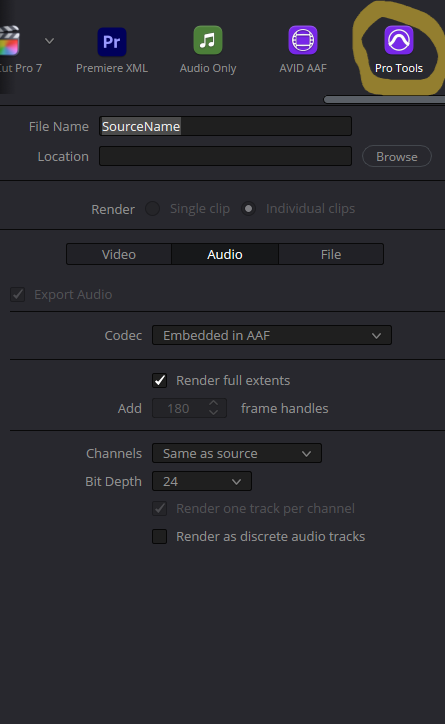
Now, head over to the Deliver tab. Click the Audio tab.
Don’t use the "File > Export" menu. Instead, select the Pro Tools preset. It’s optimized specifically for this handoff.
Format: Wave / Linear PCM.
Embedded vs. Referenced:
Referenced: Best for longer projects. It keeps the audio files separate from the AAF file to avoid file-size errors.
Embedded: Good for short projects (under 5 mins). Everything is in one file.
Referenced Handles: Set your handles to 100–180 frames. This gives your sound editor extra "meat" on the ends of clips to create smooth fades or find room tone.
Embedded: Click render full extents
Do not export video with the AAF do that separately
4. The Reference Video
Your sound editor needs to see what they’re hearing. Do this after you export the AAF.
Codec: Use ProRes 422 Proxy or DNxHR or DNxHD. If you are worried about the overall project file size you can also export using the youtube preset.
Resolution: 1280x720 is usually plenty. It keeps the file size small and the performance snappy.
Burn-In Timecode: This is vital. Go to Workspace > Data Burn-In. Check Record Timecode and place it in the top right. Project Tab check apply to project. Deliver page - advanced settings-Video Tab- make sure Data Burn-In is set to same as project. This way, if there’s a sync issue, you both can reference the exact same frame
Export audio with this video.

5. Troubleshooting (The "Don't Panic" Section)
Even the best exports can hit a snag. Here are the two most common culprits:
The "No Effects" Rule: Resolve won't bake in your Fairlight FX or EQs into the AAF. If you have a clip that needs a specific effect, consult with your mixer before rendering it in place. Mixers will want the clean original audio files with no effects applied. Feel free to ask them if it’s a particular effect production wanted.
Speed Changes: If you have clips with speed changes made in Resolve, they can sometimes cause "Blank AAF" errors. If the export fails, try removing speed changes or "Decomposing" those clips back to their original speed.
Need a hand with the technical side?
If you're still hitting errors during the export, let me know the specific error message. I'd be happy to help you troubleshoot the nitty-gritty.